Why Control Joint Concrete Cutting Is One of the Most Hazard-Dense Tasks on Any Slab Project
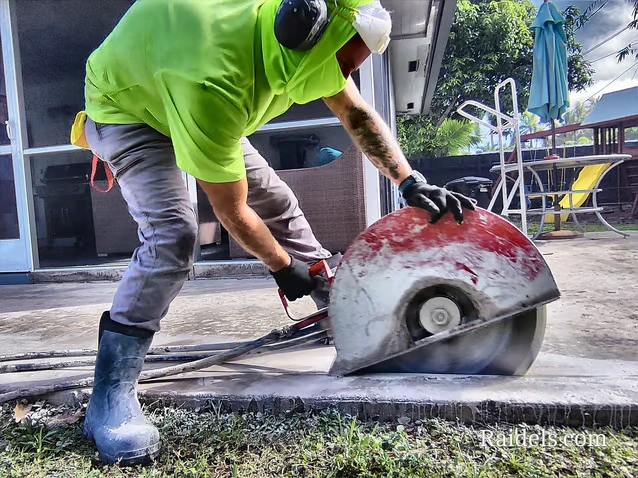
Control joints are engineered weak planes deliberately cut into concrete slabs to manage crack propagation caused by shrinkage, thermal cycling, and load-induced stress. Cutting them sounds routine. It isn’t. Every time a crew sets up a walk-behind saw or an early-entry dry-cut machine to install or re-cut a control joint in concrete, they are operating within a convergence of mechanical, chemical, and ergonomic hazards that OSHA specifically addresses under 29 CFR 1926 Subpart Q and the Respirable Crystalline Silica Standard (29 CFR 1926.1153). The depth, spacing, and timing of control joint cuts are engineering decisions — but the safety execution is a field responsibility. Getting that execution wrong results in blade fractures, crystalline silica overexposure, equipment-induced vibration disorders, and trench-foot-level cumulative injuries that don’t show up until years later. This post is a technical breakdown of the protocols that keep crews safe, keep projects OSHA-compliant, and keep liability off the contractor’s desk.
Pre-Cut Hazard Assessment for Control Joint Layouts
Before a single blade touches a slab, a formal pre-cut hazard assessment must be completed and documented. This is not a walkthrough — it is a structured written evaluation. On Miami commercial and DOT job sites, this document becomes part of the project safety file and is subject to inspection.
Embedded Utility Mapping and GPR Scanning Requirements
Control joint lines are typically laid out at 24 to 36 times the slab thickness in both directions, which means cuts often run across areas with embedded conduit, post-tension cables, radiant heat tubing, or rebar chairs. Striking a post-tension tendon during a control joint cut is a catastrophic event — tendon release can project fragments at velocities exceeding 200 mph. OSHA 29 CFR 1926.651 requires positive identification of all underground utilities before any cutting or excavation activity. On slab work, this translates to Ground Penetrating Radar (GPR) scanning of every proposed joint line prior to layout marking. The GPR scan report must be reviewed by the saw operator and the site supervisor before work begins. No exceptions, no shortcuts based on “we’ve done this slab before.”
Slab Age and Curing Status Verification
Early-entry dry-cut saws are designed to cut control joints within 1 to 4 hours of finishing, before random cracking initiates. However, cutting too early — before the concrete has developed sufficient surface hardness — causes raveling and aggregate pullout that can jam blades and create projectile hazards. Crews must verify mix design, ambient temperature, and surface hardness using a scratch test or penetration resistance gauge before committing to early-entry cutting. In Miami’s high-humidity, high-temperature environment, curing accelerates significantly, and the cutting window can compress to under 90 minutes during summer pours.
OSHA Table 1 Compliance for Silica Dust During Joint Cutting Operations
Respirable crystalline silica is the most statistically significant long-term health hazard in concrete cutting operations. OSHA’s Table 1 under 29 CFR 1926.1153 specifies engineering and work practice controls that eliminate the need for air monitoring when followed correctly. For control joint cutting with walk-behind saws, Table 1 mandates one of the following control methods:
- Wet cutting with a continuous water delivery system that supplies water directly to the blade-slab interface at a minimum flow rate sufficient to suppress visible dust at the point of cut
- Integrated blade-mounted vacuum shroud connected to a HEPA-filtered vacuum system rated at a minimum of 25 CFM at the point of capture
- Operator isolation in an enclosed cab with a HEPA-filtered ventilation system for ride-on joint saws on large slab pours
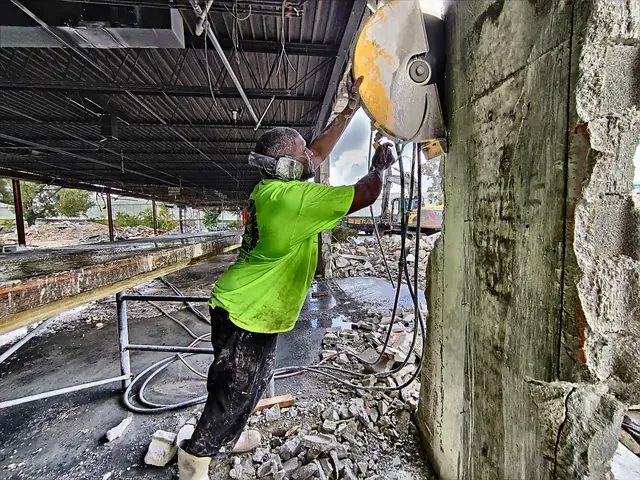
Wet cutting is the dominant method for control joint work in Miami, but the water supply system must be inspected before each shift. Clogged nozzles, kinked supply lines, or insufficient tank pressure will cause the system to fail mid-cut without any visible indication to the operator. A daily pre-operation checklist for the water delivery system is a Table 1 compliance requirement, not an optional best practice. For detailed saw-cut concrete safety protocols specific to Miami job sites, the engineering controls must be matched to the specific equipment in use.
Blade Selection, Inspection, and Maximum Operating Speed Protocols
Diamond blade failure during control joint cutting is a direct result of three preventable errors — wrong blade specification for the concrete hardness, operating above the blade’s Maximum Operating Speed (MOS), and running a damaged blade that should have been retired. Each of these errors has a specific OSHA and ANSI reference point.
Matching Blade Bond Hardness to Aggregate and Mix Design
Control joint cuts are typically shallow — one-quarter to one-third of the slab depth — but the blade must still be matched to the concrete’s abrasiveness. Hard aggregate (granite, quartzite) requires a soft-bond blade that releases diamonds continuously. Soft aggregate (limestone, which is common in South Florida mixes) requires a hard-bond blade. Running a soft-bond blade in limestone concrete causes rapid segment wear, uneven blade geometry, and lateral instability that increases the risk of blade walk and operator loss of control. Blade specification must be confirmed against the mix design before the saw is loaded.
Pre-Use Blade Inspection Checklist
ANSI B7.1 and OSHA 29 CFR 1926.303 require that all abrasive and diamond cutting wheels be inspected before each use. For control joint diamond blades, the inspection must cover:
- Core integrity — check for cracks, warping, or stress fractures using a visual ring test (tap the blade; a clear ring indicates no cracks)
- Segment condition — undercutting of the steel core beneath segments indicates the blade is operating in conditions too hard for its bond; retire immediately
- Arbor hole fit — the arbor hole must match the saw spindle exactly; adapters that create play are prohibited
- Maximum RPM rating — verify the blade’s rated RPM exceeds the saw’s no-load speed at the blade guard nameplate
Hand-Arm Vibration Syndrome Prevention During Extended Joint Cutting Shifts
Walk-behind joint saws transfer significant vibration energy to the operator’s hands and arms through the guide handle. Prolonged daily exposure above the OSHA action level of 2.5 m/s² (A(8)) leads to Hand-Arm Vibration Syndrome (HAVS), a progressive vascular and neurological condition with no cure once advanced. Miami crews running full-day joint cutting operations on large slab pours — warehouse floors, parking decks, airport aprons — are at measurable risk. Hydraulic saw safety protocols specifically address vibration transmission management for high-output cutting equipment.
Mitigation requires anti-vibration gloves rated to ISO 10819, mandatory rotation of operators every 30 minutes during continuous cutting, and daily vibration exposure logging. Equipment maintenance is equally critical — worn blade flanges, unbalanced blades, and loose guide handles all amplify vibration transmission beyond the manufacturer’s baseline specifications.
Respiratory PPE Hierarchy and Fit-Testing Requirements
Even when Table 1 engineering controls are in place, respiratory PPE serves as the final line of defense. For control joint cutting operations, the minimum respiratory protection is a NIOSH-approved N95 filtering facepiece respirator. However, N95 respirators require annual fit-testing under OSHA’s Respiratory Protection Standard (29 CFR 1910.134), which applies to construction via 29 CFR 1926.103. Crews showing up to a joint cutting job without documented fit-testing records are out of compliance regardless of whether they are wearing the respirator correctly. Half-face elastomeric respirators with P100 particulate cartridges provide a higher assigned protection factor (APF 10 vs. APF 10 for N95, but with more reliable face seal) and are the preferred option for extended-duration joint cutting shifts.
Wet Slurry Management and Environmental Compliance on Miami Sites
Wet cutting control joints generates alkaline slurry with a pH typically between 11 and 13. Allowing this slurry to enter storm drains violates Miami-Dade County stormwater ordinances and EPA Clean Water Act Section 402 NPDES permit requirements. Slurry must be contained using berms, absorbent socks, or vacuum recovery systems, allowed to dry, and disposed of as solid waste. Slurry that reaches storm drain inlets triggers immediate stop-work authority and potential EPA enforcement action. The cost implications of concrete cutting operations must always account for compliant slurry management as a line-item expense, not an afterthought.
Post-Cut Joint Inspection and Crew Debrief Protocol
After control joint cutting is complete, a post-cut inspection documents joint depth, width consistency, and any blade deviation from the layout line. Joints that are too shallow — less than one-quarter of slab depth — will not function as designed and will cause random cracking elsewhere, requiring remedial saw cutting under more difficult conditions. The post-cut debrief with the crew should address any near-miss events, equipment anomalies, or PPE compliance gaps observed during the shift. This debrief is documented and retained as part of the project safety record. Building a culture where crews report near-misses without fear of discipline is the single most effective long-term safety intervention available to any concrete cutting operation.
Control joint concrete work is precision engineering executed in a hazardous environment. The protocols outlined here are not bureaucratic overhead — they are the operational framework that keeps experienced crews working for decades instead of filing workers’ compensation claims after year three. Every cut is a safety decision. Make it deliberately.